Thursday 23 May 2013

Ugly Rose Stained Antique Dresser Makeover & A Fun Vignette!

Hello All

Do you remember sometime ago I posed a question 'How to re-tint and varnish antique wooden furniture?' 

Well, thank you to all of you who responded and gave me some great advice.


This antique dresser was an ugly rose-tinted piece. And it took hours and hours of work to strip the rose/mahogany stain off with an industrial stain and varnish stripper that I bought from Bunnings Warehouse.

 I finally managed to get it all off and then sanded it down well, stained it with a dark walnut stain and finished with a coat of Cabot's Danish oil for a mellow shine.


Just to give you guys a reminder of the before and after…


Can you see the difference?

I painted the handles with black acrylic paint and then decoupaged them with french verbs and sealed them all. It was cheap way to complete the job. I might change my mind tomorrow and get a few nice antique gold drawer pulls to match.


It looks so much better now that it's no longer a reddish pink, but a dark 'walnuty goldenish' colour instead. 

I can honestly say the dresser looks even better in person!


The dresser now sits in my main guest bedroom downstairs giving the room some much needed storage. 

Can you ever have enough storage!?!

You can see a part of the antique gold bed frame. It's the Priscilla bed from Freedom Furniture. I think it has been discontinued. I loved it the minute I saw it. 

I was contemplating painting it white or black but I think I'll leave it as is, since the lamp and the bed frame are working well together.


I decided to put together a few things to make a vignette on the new dresser.


Some bling?…How about a gold lamp?


The lamp received a makeover last year and again today. It was white and black and I wanted something fun for this room and I thought why not go for gold…?(pun intended!)
Some metallic gold spray paint did the job.

I randomly added a few gold leaf removable stickers from the dollar store and I think it looks quite pretty, fun and feminine now!


The vintage car is actually a phone! But it's not connected. I just used it to add a fun element to the vignette. And the reddish orange car matches the border of the poster.


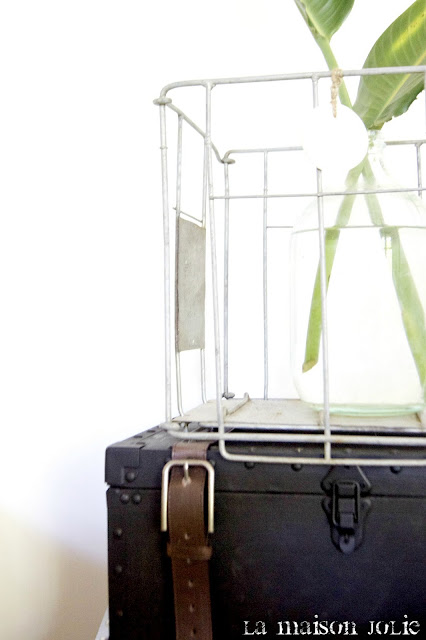
A pop of green from the garden in a vintage oil bottle.


I framed a poster of Paris that a friend gave me. I already had the frame stored away. And the colours are earthy and rustic, so they complement each other.


Along with the wooden frame I added a smaller black one.
I layered it on top of the bigger frame to give the vignette some depth.


The backdrop behind the bed is a large bamboo blind that is hung from couple of hooks. Originally I wanted an accent wall that I could easily change. But now I'm not too sure it works. Might have to take it down.

Once the room is complete, I might put the framed poster up on the wall to free up some space on the dresser, just to be a little practical when guests stay over.


So far so good!

I'm still doing up this guest room. Promise to share some more pictures soon.

Also coming soon study/second guest room makeover, so watch this space!

Thanks so much for stopping by! 
It makes my day every time you stop by for a visit!

xox
Rani

Wednesday 22 May 2013

Coming Together: Study / GuestRoom Makeover!


It's all coming together in our upstairs Study/GuestRoom. It's taken a long time to set up. Sorry about the blurry pictures. I took then with my mobile phone while setting it up. It's still a 'work-in-progress' since I'm still gathering and making over all the different elements for the room.


I had put together a mood board of the sort of colour palette that I wanted to go along with. Mostly neutrals since it's a small room. I envisioned a calm and relaxing space and also an inspiring space.


I had a few knick knacks that I wanted to keep and the rest was going to be either put away or donated.


This room is mostly used by my husband as his study and sometimes by me. When we have a lot of guests visiting, we use it as a second guest room. 

One day it will be turned into the nursery.


The mood board that I pinned up was one that I already had. 

The white walls and white furniture and natural burlap are a great combination. It compliments the space beautifully. 


A vintage pencil sharpener that used to belong to my father-in-law and then my husband during their school days. It still works beautifully!


The white study desk is from IKEA.

The desk storage is also from IKEA. 


The accessories are from various different shops in Fitzroy, that we bought when we moved into this house last year.


The white floating shelves are also from IKEA.


The Provincial cross back chair is from Early Settler. We bought a couple of extra ones when we bought the dining room set last year. They are pretty versatile in design and look good almost everywhere. 

The natural wood colour was not working in this room so I painted it white and to match the desk and the shelves. I distressed the chair lightly to give it that well-loved, lived-in look, left the seat natural for contrast and the chair was ready to be set-up with the desk!


A simple cheap white lamp from IKEA from university days when my husband and I were both students. This lamp served us well.


If you look closely, you can see a sneak peek of the rest of the room.


I haven't dressed the shelves yet. Just put the books on the shelves and clicked a few pictures (I'm just an impatient soul!). Next weekend, I promise to dress the shelves up.


Things completed:
The bed head was gray, I re-covered it with natural drop cloth, keeping in line with the new colour palette of the room. 
The artwork for the blank wall on top of the bed is also done.

There's still a long long list of things to do:
 I still have to dress the bed
Clean up the other side of the room
Store extra books away
Need a bedside lamp, table, bookshelf and a plant for the room

Stay tuned for better pictures of the study and also the rest of the room reveal.

Thanks for stopping by!
xox
Rani

Tuesday 14 May 2013

Room Reveal: Our Living Room Makeover!

Yes.. Yes.. Yes, I'm on a roll! One more room reveal!

Its taken a looooong time to get here. And though I'm saying that it is done, you do know I mean its done for now? ;) 
(Shhhh…don't tell my husband!)

Before I show you the makeover, I need to take you back in time, just for a bit…

Our Living Room Timeline:

Do you remember my living room earlier? 

It looked something like this

Then it looked like this.

Then came my Living Room Inspiration Post…where I shared some Living Rooms that looked just scrumptious!

Well, after all that… here's our Living Room.


The colour scheme of the living Room is neutral with pops of black and muted red.  


Here's the view from another angle…


Little details on the coffee table… 
A souvenir from Newcastle and a vintage French book from a flea market.


Mini cushions (that I made)…to add that homey feel. Okay you caught me, I love cushions! The more the merrier!


You can see the other ceramic drum stool peeking into the frame.


I actually love this wall art… It adds a bit of interest to the wall behind the TV and helps balance the blank space. 

And it's quintessentially French Provincial!


The rug matches the small lumbar cushion on the other couch. But I think this space needs a round more neutral rug or a bold stripy rug. I can't quite make up my mind on this one!


Another mini grain sack cushion.


The frames are simple and sleek black metal. I cut some white matting myself (since the quote of getting the matting professionally cut for 6 frames that size was over $300) and printed out black and white photographs taken on our trip to France and Italy this year in January. 


I deliberately chose large size frames and thick white matting (the same colour as our wall paint) to make the photographs the focal point. 


didn't want too much black on the wall and the white matting helps, it makes the photos look like they are floating on the wall.


This was a garage sale score - a huge and heavy antique mirror that will be put up on the wall…one day soon! 


I love how the eye is drawn to the photographs in the centre.


That's a French film poster "Jour De fête" by Jacques Tati, that I ordered from a poster shop in Fitzroy, Victoria. It adds a bright splash of colour to this otherwise neutral living room.


A tripod lamp that I made from an old music stand. That's a simple linen shade bought on sale from Target.


I saw the music stand lamp first on Kristine's blog, The Painted Hive and was so impressed. I had an old music stand lying in my garage that I had used to display signs during my product launch last year in July. But since then it was just gathering dust. So after I saw Kristine's tutorial, I decided to put the stand to good use.

I tried wiring it myself, even bought all the supplies from the hardware store but after nearly burning the house down, I knew I had to seek professional help. 

I scouted around a lot of light shops, but to my surprise, every shop I went to turned me down and said that it was not a feasible project! 


Then by sheer luck I happened to drop into a light store called Lights Lights Lights on Mt Alexander Road. The staff at LLL, Danielle, Elias and George were amazingly helpful! They had such a positive can do attitude! They wired my lamp in no time and now it works beautifully!
(And they have some gorgeous lights at their store!)


Moving on…that's a storage box or rather a 'vintage chest'. It stores all our old magazines. 


To see the tutorial on how I turned an ordinary storage box into a vintage chest, click here.


The living room gets a lot of natural light all day long and is probably my favourite room in the house.


The coffee table was a makeover project as well. I gave the table top a faux rust treatment to give it an industrial look.


It's a calm and cosy place to sit and chat for hours with friends or watch TV or just lie down on that comfy couch with a good book.


We love how comfy and uncluttered the living room looks and feels. And the best part, my husband loves the makeover!

Well there you have it…


Hope you enjoyed my Living Room Reveal!

Thanks so much for stopping by!

xox
Rani

async defer data-pin-hover="true" data-pin-tall="true" data-pin-round="true" data-pin-save="false" src="//assets.pinterest.com/js/pinit.js">